
What is Google Analytics:
Google Analytics is a web analytics service offered by Google that tracks and reports website traffic information.
List of Reports can be viewed on Google Analytics Dashboard (Google Marketing Platform)
- Home.
- Customization.
- Real-time.
- Audience.
- Acquisition.
- Behavior.
- Conversions.
- Attribution – (New Feature – Google Analytics Attribution Beta 2019)
- Discover.
- Admin.
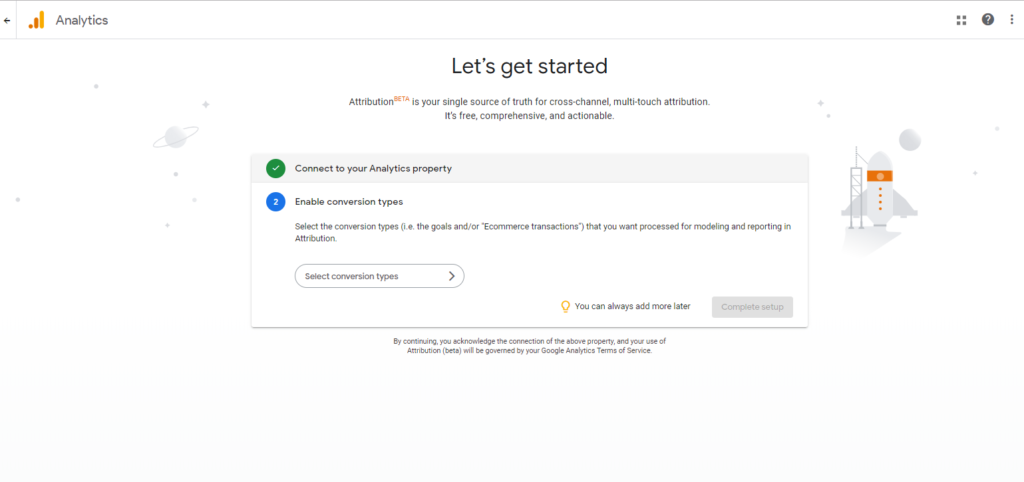
Let’s go directly to the topic of “Google Analytics Attribution Beta” – A Data Driven Attribution Model (DDA Model Google)

What is Attribution model?
It is the rule, or set of rules, that determines how credit for sales and conversions is assigned to touchpoints in conversion paths.
Video Credits: Hubspot.
Google Analytics Attribution release date (GA – Attribution Model release date)
Google announced a Free version of Google Attribution tool in May 2017. It still in beta from the launch.
Attribution Beta Features:
- Data Driven Attribution Model Google analytics.
- Journey of Cross-Channel Conversions.
- Credit shift analysis. (Last interaction model gets 100% credit to the final touchpoints).
Google’s DDA Model can be more accurately figures out and gives credit to all the Ad clicks (Google Ads – DDA Ads) that led to conversion by their advanced Machine Learning techniques. It is available for all eligible advertisers.
Try check it out the Data Driven Attribution Model (DDA Model) here: https://www.google.com/analytics/attribution/onboarding
Connect your Google Analytics with Google Attribution – Tutorial (Step by Step Method Instructions)
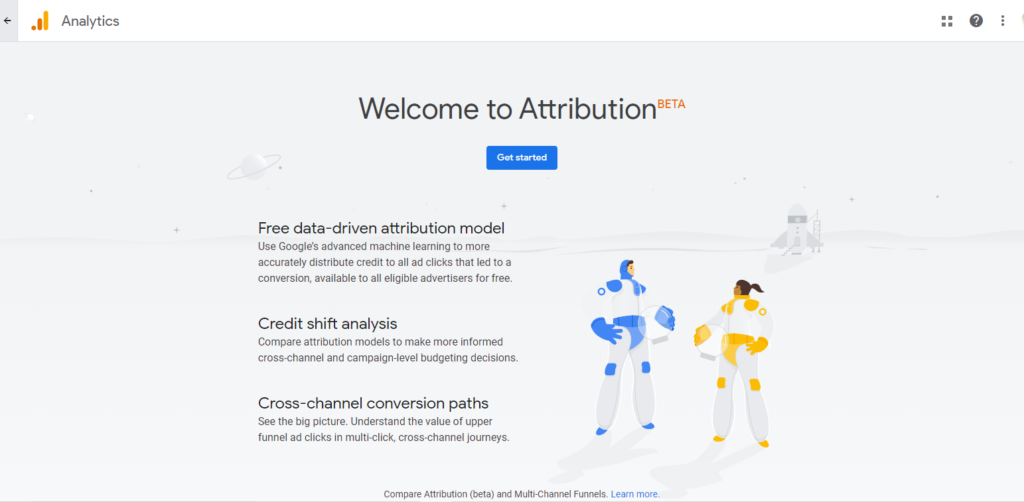
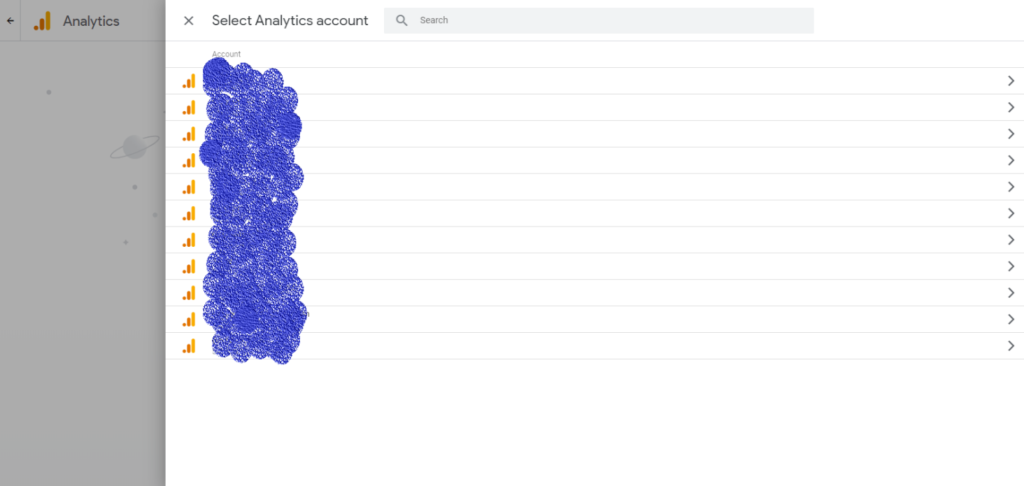
Click on the “Get Started” Button. Then it will be redirected for you to Connect your Analytics property with “Google Attribution Beta 2019”. The Page looks like the below image.
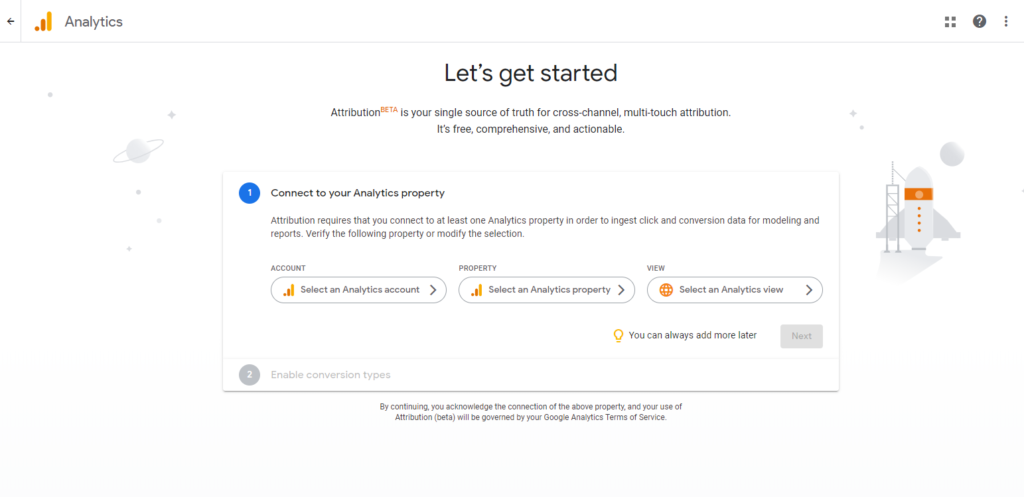
Connect to your Analytics property:
After Selecting the “Google Analytics – Account in the First step, then connect it with the Property. Refer below image.

While connecting the Analytics Account with Property and view. It may show like this,
“Cannot be linked because of the following reasons:
This Analytics view has no conversion types.
A view can only be connected if it has goals and/or is e-commerce enabled.”
if your account is not connected with “Conversion Type” feature enabled to certain property. Here, how to solve this GA view to enable to get Conversion type to your property? Follow the below steps.
How to set up goal conversions in Google analytics?
Connect your Conversions metrics to Attribution DDA Model.
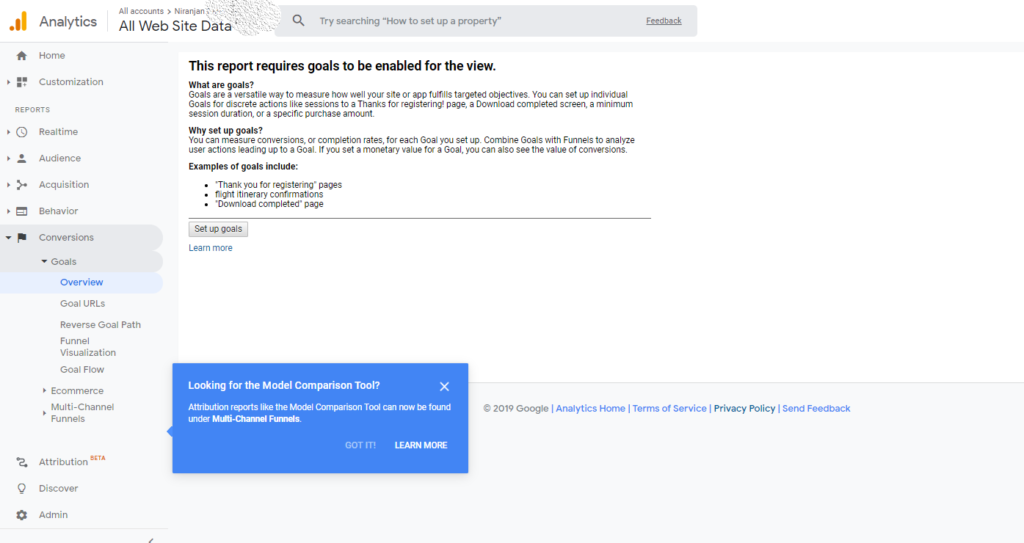
- Go to Analytics Dashboard and Click “Conversions” Tab.
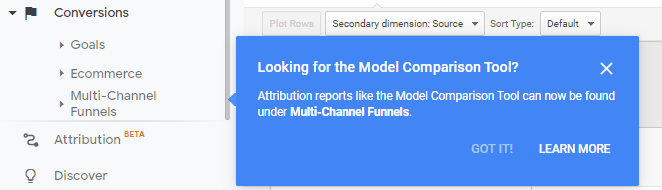
Learn more about – Multi Channel Funnel (MCF) Model Comparison Tool – Click here – https://support.google.com/analytics/answer/6148697
- Click on “Goals” tab under “Conversions” tab.
- Then Click “Overview” tab as seen on the below image.
- Right hand side of the Dashboard shows you to setup goal conversion for your website/Apps.
Examples of Goal Conversions:
- “Thank your registering event” page.
- “Download Completed” page.
- “Your Booking was Confirmed” page.
Why setup goals to your website/app?
- Easy to measure/track conversion rate.
- Funnels helps you to analyse user actions in your website/app leading to Landing page goal.
2. Click on “Setup Goals” button. Learn more about goals: https://support.google.com/analytics/answer/1012040
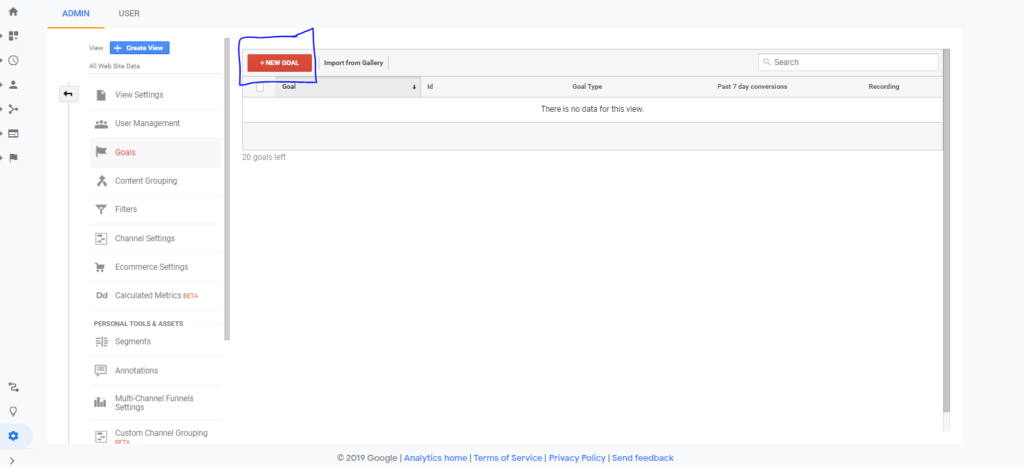
How to setup a Goal Conversion in Google Analytics?
3. Click on Red colour – “+New Goal” button. Google analytics will automatically takes you to “Goal Setup” page.
4. Goal Setup will show you enough features and list about where your Google Analytics Goal Setup Conversion Tracking Code should be placed in your E-commerce website/ Application.
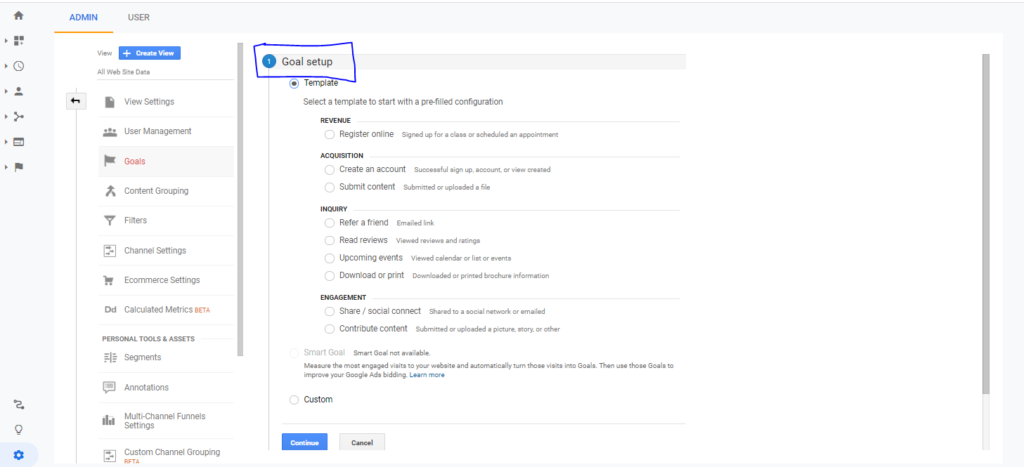
Setup goal comes with the 4 templates to start pre-filled configuration.
- Revenue. (Register Online)
- Acquisition. (Create an Account, Submit content)
- Inquiry. (Refer a friend, read reviews, Upcoming events, Download or print)
- Engagement. (Share/social content)
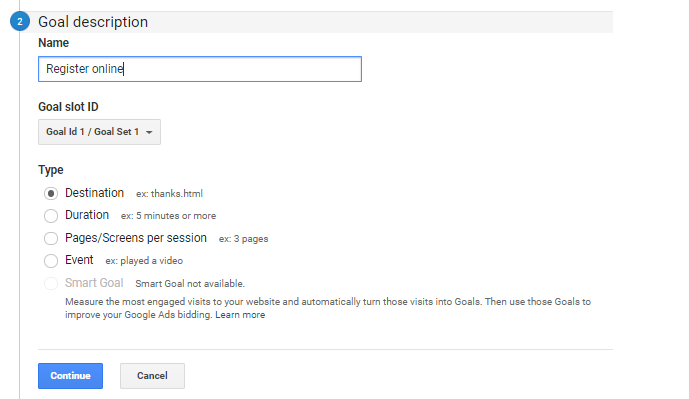
5. Select the type of Goal conversion in Goal description.
Ex: Destination – (www.example.com/thanks.html)
Placing the Goal conversions, let you whether your customer purchased your product and the prospect was turned successful.
Here we are the created the Goal Conversion type name as “Register online”. It will be used at Selecting Attribution – Conversion Types.
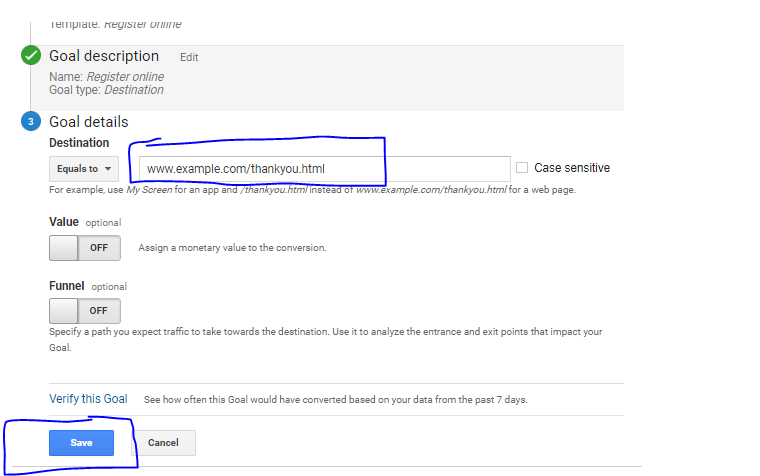
6. Enter the URL, where Google analytics goal setup conversion tracking code is be uploaded.
7. Then enter “Save” button – Google will check your website activity and tries to pull out the relevant data for Conversion tracking.
Once the Conversion tracking code is entered, you can again come back to “Attributes” tab in Google Analytics.
Select the property and click the view. Now it will redirect you to set – “Enable conversion types”
2nd step in configuring Google analytics Attribution will take you “Select Conversion Type”
Click on the “Register online” (Goal Conversion name) and save it.
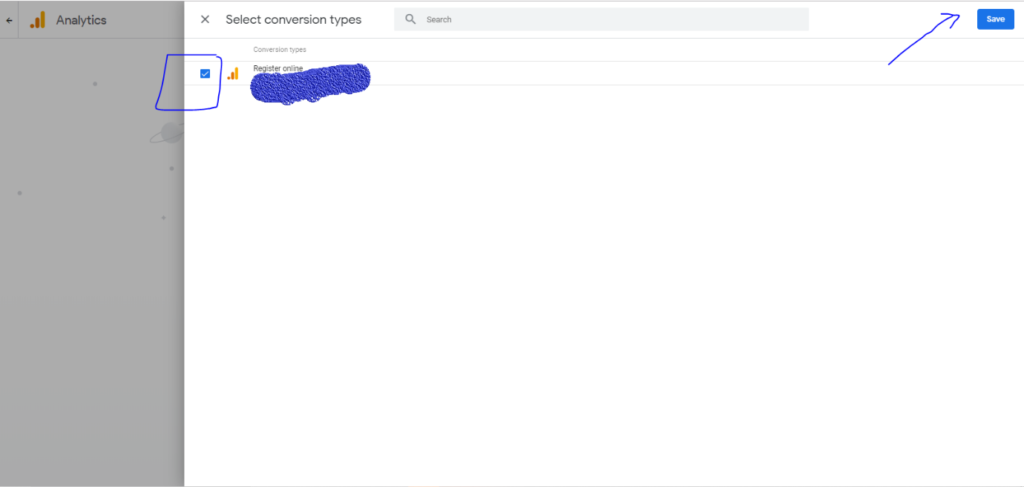
Then click on “Complete Setup” button to enable “Google Analytics Attribution Beta”.
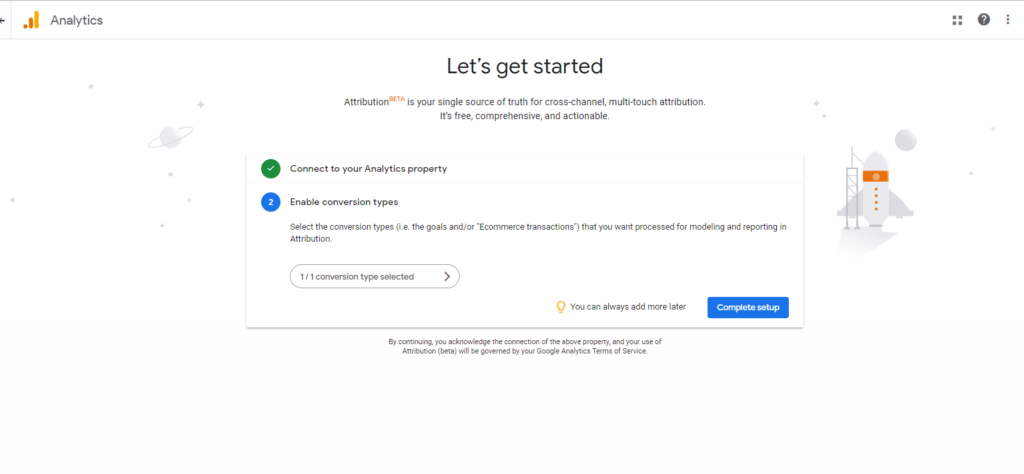
Yes, its done!
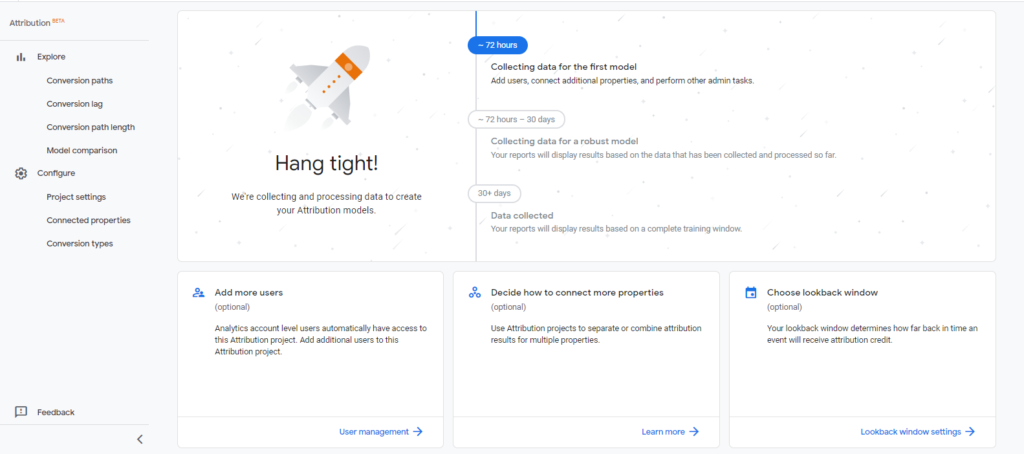
Now, Google analytics will start collecting and processing data to create your Attribution models.
About the author:

Niranjan is one of the Top Digital Marketing Professional from Chennai, India. He is having 5 years of experience in #Digital Marketing and #Analytics.
Follow Niranjan on Social media:
Facebook: www.facebook.com/NiranjanR555
Twitter: www.twitter.com/Niranjan_555
Instagram: www.instagram.com/niranja555
LinkedIn: www.linkedin.com/in/niranjan-ramesh-babu

Middle is “Niranjan” – Top Digital Marketing Professional.
Right Corner is “Sorav Jain” – No:1 Digital Marketer in India.
